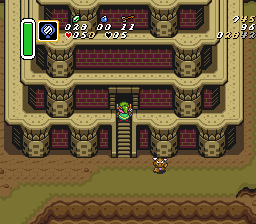
Tower of Hera
 | |
| Boss | Moldorm |
|---|---|
| Dungeon item | Moon Pearl |
| Previous dungeon | Desert Palace |
| Next dungeon | Agahnim's Tower |
Contents
Any% NMG
Desert Escape
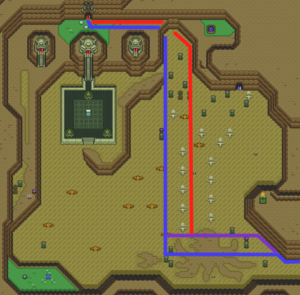
First, you have to find a way through the desert. There are three possibilities. The blue path shows the optimal (and most difficult) path, the purple is the intermediate strat, and the red path is easiest but slowest. The blue path is about 15 frames quicker than the purple route, which is about 20 frames quicker than the red route.
For the blue path: (aka cactus dash)
Dash down until you reach the two cacti and then dash right and out. This strat is quite difficult because the dash between the cacti is pixel perfect, and therefore, requires frame perfect dashing to make it through. Note that you must dash under the rock at the start (see the good advice below), and you mustn't move down before starting your dash charge. Doing so can result in the dash alignment being off due to the 4 pixel/frame movement.
For the purple path:
You just need one dash down and one dash to the right but you have to perform a small trick to avoid the hit from the Sandman. As you change your direction, immediately slash your sword to the right and start your second dash. The Sandman is getting hit and your on the way to the right.
For an example, watch this highlight on Twitch: Sandman Slash Dash
For the red path:
First, you don't want the dash under the rock, as extra distance on your ledge hop is a good thing here. Just lift the rock immediately to your right and dash. After you jump from the ledge, move to the right as far as possible and than start do dash down and to the right. There will be no Sandman. A good cue for when to dash right is when Link hits the top of the mouth of octopus pattern on the ground.
Good advice:
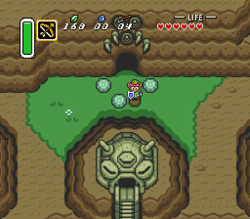
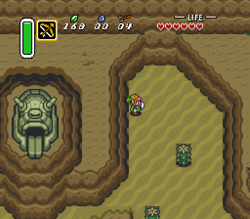
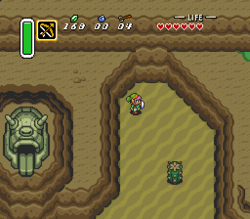
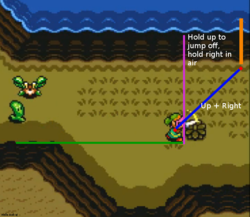
To be quite close after the jump down on the wall, there is a small trick. First lift the rock as you can see on the picture below and get in the right position. ( It does not have to be pixelperfect ). While you look down, start dashing and then move to the right.
If you did everything correctly, you should stand like on the first picture below.
Fake Flippers
We will use a teleporter that brings us directly to the bottom of the death mountain which is on the next screen.
We will use the "Fake Flippers". The fastest way is to align with the wall on the bottom and with the bush. After you align with the wall, slash the bush and walk diagonal as you can see on the picture below. After the jump from the ledge, press right to get in the screen transition which activate the Fake Flippers.
Pay attention to the nearest Zora. If you are hit you get a softlock and your console/emulator need a reset.
Flying tiles room
There are two options for this room.
Number 1
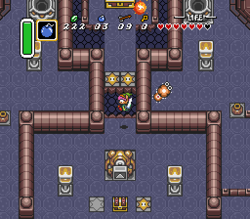
Dash to the left, lift the first pot, throw it against the switch and survive the flying tiles.
Number 2
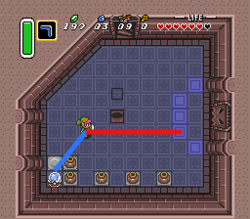
Dash to the left, lift the first pot throw it against the switch and then get into the right position. Throw your boomerang diagonal against the switch and dash to the right ( Item Dash: Press Y and A at the same moment ). Note that both components of the diagonal input (< and v) must be on the same frame as the Y and A of the item dash. Otherwise the trick will not work. Stop at the right position to be under the blue pegs and get invulnerability. This trick allows you to skip hitting the switch in the next room, saving a small amount of time.
Moon Pearl bomb jump
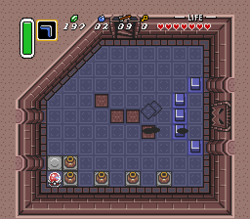
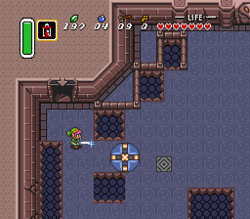
To get the Moon Pearl as early as possible we will use a bombjump. You can use your sword for alignment as you can see on the first picture. Be as close as possible to the gap. Head to the left and start your dash shortly before the bomb changes his colors and explode and than dash into the wall. Dashing and bonking here will increase your pixel range from 2 to 6 pixel. The result is seen on the second picture. The bomb "boost" you now over the gap. If everything is done correctly, you pass the gap without falling down. Be sure to not activate one of the star formed switchs on the floor.
If you need more information, you should read this description: Bombjump
Bumper Room
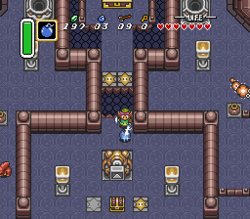
Enter the room, move down and get yourself in a position to dash through above the blue bumper. You have a 4 pixel window (Y-axis, X-axis doesn't matter) to work with to get the dash successfully. To align yourself easier you can hold your sword out like in the picture below.
Collected Items
You pick up Moon Pearl in this dungeon.
Boss
Trivia
- Moldorm is often called "Trolldorm" because he is one of the biggest speedrun killers.
