Difference between revisions of "Turtle Rock"
(→100% NMG) |
m (→Collected Items) |
||
| (10 intermediate revisions by 5 users not shown) | |||
| Line 1: | Line 1: | ||
{{Dungeon | {{Dungeon | ||
| − | |name=Turtle Rock | + | | name=Turtle Rock |
| − | |boss=Trinexx | + | | boss=[[Trinexx]] |
| − | |item=Mirror Shield | + | | item=[[Mirror Shield]] |
| − | |crystal=7th | + | | crystal=7th |
| − | |prev_dungeon=Misery Mire | + | | prev_dungeon=[[Misery Mire]] |
| − | |next_dungeon=Ganon's Tower | + | | next_dungeon=[[Ganon's Tower]] |
}} | }} | ||
| Line 14: | Line 14: | ||
Placeholder text .. | Placeholder text .. | ||
| − | === Key Pokey === | + | === Key Pokey 1 === |
| − | + | To kill a Pokey in one spin you have to let it jump into your spin attack. Position yourself in the Pokey's path in front of it and make sure not to poke it with your sword. In this room it is a good idea to slash either left or right (whichever is the opposite of the direction the Pokey is going in) to avoid hitting any of the enemies with sword beams, in case you have them. Remember that sometimes Pokey-body parts will fly around the room and you basically aim their trajectory when you kill the poor thing, so try to consider it when picking a position. | |
| + | |||
| + | Look at the Pokey while you enter the room: If it's going up, you can walk a few steps into the room before you charge your sword. If it's going down, you need to slash immediately. | ||
| + | |||
| + | Anticipate where possible items will drop (key/fairy!) and get used to the time it takes Link to actually pick them up. If you time it really well, you can sometimes even save some frames by charging a dash while waiting, but picking up the fairy is probably more important. | ||
| + | |||
| + | {{VideoBox | ||
| + | | title= | ||
| + | | time= | ||
| + | | file= File:Nmg-trock-keypokey.mp4 | ||
| + | | width= 340 | ||
| + | | description= It's hard to actually save time with a dash in here. | ||
| + | }}{{VideoBox | ||
| + | | title= | ||
| + | | time= | ||
| + | | file= File:Nmg-trock-keypokey-keydash.mp4 | ||
| + | | width= 340 | ||
| + | | description= If you're in a situation where you don't care about the drops, setting up a keydash is easy for the upper patterns: just hug the top wall. | ||
| + | }} | ||
=== Chomps === | === Chomps === | ||
| − | + | There are many strats for this room, that all have their uses depending on RNG/resources. When you enter the room, walk straight forward for a few steps and take that time to look at the chomps' movement, gauge which way will least likely be blocked and pick a direction to go in: left, right or center. Success is never guaranteed - these guys can and will block your shots at the last possible moment or hit you in some undodgable fashion, if they want to. The most important thing on this screen is probably to know how to react when things go wrong! | |
| + | |||
| + | {{VideoBox | ||
| + | | title=2x Cane | ||
| + | | time= | ||
| + | | file= File:Nmg-trock-chomps-stdnobeams.mp4 | ||
| + | | width= 340 | ||
| + | | description=This strat arguably provides the best compromise between speed and safety, because you get invincibility from the pegs all the way up to the chest. It works the same way no matter if you are on the left or right side of the room. | ||
| + | }} | ||
| + | |||
| + | The longer you spend in this room, the more chances you give the chomps to get in your way. Going as fast as possible is the best safety! Some things to be aware of when trying to optimize this strat: | ||
| + | *Place the first cane block as early as possible | ||
| + | *Don't push the cane block | ||
| + | *Detonate the second cane block as soon as possible AFTER the pegs switch | ||
| + | *Keep moving while the cane projectiles are traveling towards the switch | ||
| + | *Push the upper half of the switch block | ||
| + | *Hold diagonal towards the chest as soon as the switch block starts moving | ||
| + | |||
| + | {{VideoBox | ||
| + | | title=Backup | ||
| + | | time= | ||
| + | | file= File:Nmg-trock-chomps-backup.mp4 | ||
| + | | width= 340 | ||
| + | | description=When you suspect your path and/or line of fire will be blocked on both the left and right side, this is a useful backup. Place the block closer to one switch than the other, dodge the first lunge attack and detonate only when you are right in front of the pegs. | ||
| + | }} | ||
| + | |||
| + | The first lunge attack can happen anywhere between 3-4 seconds after entering the room and the delay between the two chomps' attacks can be anywhere between 0-64 frames. Anything after the first attack is hard to test, because the randomness spirals out of control the longer you spend in the room. | ||
| + | |||
| + | === Key Pokey 2 === | ||
| + | |||
| + | When you're approaching this room, think about whether you need to hit the switch and whether you need/want to pick up the (other) drops from the Pokey. | ||
| + | |||
| + | The easy way to do this room is to pull out the Fire Rod and blast the Pokey (caution: flying body parts may still appear), then take the hit from the Rabbit Beam intentionally. This also allows you to use fire in the upcoming double Pokey room. Costs about 4-5 seconds in total, since you use some extra menus and need more magic. | ||
| + | |||
| + | The laser eye only starts shooting when Link faces it. If you're approaching the door from below, walk all the way to the wall before you move up in front of the eye. For some reason it is much more lenient when approaching from above. | ||
| + | |||
| + | |||
| + | Close to optimal strats for all four patterns, hitting the switch: | ||
| + | |||
| + | {{VideoBox | ||
| + | | title= Top Left | ||
| + | | time= | ||
| + | | file= File:Nmg-trock-keypokey2-nobeams-TL.mp4 | ||
| + | | width= 340 | ||
| + | | description= | ||
| + | }}{{VideoBox | ||
| + | | title= Top Right | ||
| + | | time= | ||
| + | | file= File:Nmg-trock-keypokey2-nobeams-TR.mp4 | ||
| + | | width= 340 | ||
| + | | description= | ||
| + | }} | ||
| − | |||
| − | + | {{VideoBox | |
| + | | title= Bottom Left | ||
| + | | time= | ||
| + | | file= File:Nmg-trock-keypokey2-nobeams-BL.mp4 | ||
| + | | width= 340 | ||
| + | | description= Keydash setup by touching the left wall, turning at the right moment while charging the dash to manipulate the laser eye. There are safer variations of this strat. For example: Wait for the Pokey to rebound off the wall and spin him closer to the center of the room, then eat the Rabbit Beam. | ||
| + | }}{{VideoBox | ||
| + | | title= Bottom Right | ||
| + | | time= | ||
| + | | file= File:Nmg-trock-keypokey2-nobeams-BR.mp4 | ||
| + | | width= 340 | ||
| + | | description= Check out that bunny-morph dodge! Spinning slightly later is much safer. | ||
| + | }} | ||
| − | |||
| − | + | === Double Pokeys === | |
| + | {{Youtube|BluntBunny made a video showing strats for all patterns!|v=KlggYWKLCQY}} | ||
=== Laser Skip === | === Laser Skip === | ||
| − | + | {{VideoBox | |
| + | | title=Fast Laser Skip | ||
| + | | time= | ||
| + | | file= File:trock-lazerskip.mp4 | ||
| + | | width= 340 | ||
| + | | description=Pressing v+A on the same frame when initiating the dash will give you a 2-frame window to get Fast Laser Skip. | ||
| + | }} | ||
| + | |||
| + | Note that if the Beetle rushes straight at you you might not have enough time to do Fast Laser Skip. In this situation (or if you're not comfortable doing Fast Laser Skip), you can use a Somaria Block to get the beetle to bounce into the pit, giving you plenty of time to setup the dash. | ||
| + | |||
| + | {{VideoBox | ||
| + | | title=Cane Laser Skip | ||
| + | | time= | ||
| + | | file= File:Trock-canelazerskip.mp4 | ||
| + | | width= 340 | ||
| + | | description=Place the Somaria Block so that the bettle bounces diagonally off of it and into the pit. | ||
| + | }} | ||
| + | |||
| + | Position yourself and dash inmediately. | ||
| + | |||
| + | {|style="margin: 0 none;" | ||
| + | | [[File:Trock-lazerskip-toppixel.png|thumb|256px|Top-most pixel you can dash on]] | ||
| + | | [[File:Trock-lazerskip-bottompixel.png|thumb|256px|Bottom-most pixel you can dash on]] | ||
| + | |} | ||
| + | |||
| + | === Big Switch Puzzle === | ||
| + | |||
| + | {{VideoBox | ||
| + | | title= Safe | ||
| + | | time= 8'23 | ||
| + | | file= File:Nmg-trock-switchpuzzle-safe.mp4 | ||
| + | | width= 340 | ||
| + | | description= Safe and easy strat with no moving parts. Make sure not to push the cane block by accident. | ||
| + | }}{{VideoBox | ||
| + | | title= Orange Canedash | ||
| + | | time= 7'38 | ||
| + | | file= File:Nmg-trock-switchpuzzle-invorange.mp4 | ||
| + | | width= 340 | ||
| + | | description= Safe for every enemy pattern, as long as you hit the orange pegs to gain invulnerability. | ||
| + | }} | ||
| − | |||
| − | + | {{VideoBox | |
| + | | title= Blue Canedash | ||
| + | | time= 7'27 | ||
| + | | file= File:Nmg-trock-switchpuzzle-invblue.mp4 | ||
| + | | description= Fastest strat when the Pokey is not in the way. Place the cane block as high as possible. Often needs a little bit of extra movement to dodge the Pokey, since all positioning required is very precise. | ||
| + | }}{{VideoBox | ||
| + | | title= Magicless | ||
| + | | time= 8'22 | ||
| + | | file= File:Nmg-trock-switchpuzzle-magicless.mp4 | ||
| + | | description= In some rare cases you might reach this room with no magic left. | ||
| + | }} | ||
== Collected Items == | == Collected Items == | ||
| − | + | ''' Arrows ''' | |
| + | |||
| + | Five relatively quick to get arrows under this pot. While you're in the pipe approaching is a good time to think about whether you need these to get the required 18 at Ice Armos. | ||
| + | |||
| + | [[File:Trockarrows.png]] | ||
| + | |||
| + | ''' Magic ''' | ||
| + | |||
| + | With standard strats you have just enough magic for the entire dungeon. Sword-beam strats at Chomps or the Crystalroller key chest can even give some leeway. The full magic refills right at the beginning and end are the only ones necessary to pick up. If one of the Pokeys drops a refill right in your path you can save frames by getting that one instead of the last pot, but you'll have two less rod shots for the Trinexx fight. | ||
| + | |||
| + | [[File:Trockmagicbombentrance.png]] [[File:Trockmagiclastroom.png]] | ||
| + | |||
| + | If you use the Fire Rod against Pokeys (or wasted some magic), you'll have to pick up one more refill. | ||
| + | |||
| + | [[File:Trockmagictorches.png]] | ||
| + | |||
| + | In case of emergency: | ||
| + | |||
| + | [[File:Trockmagicpokeys.png]] [[File:Trockmagicdarkmaze.png]] | ||
| + | |||
| + | ''' Bombs ''' | ||
| + | |||
| + | You'll need one bomb in Ganon's Tower, so grab the quick one next to the full magic refill in the Turtle Rock entrance room if you're empty. If you do the safe strategy for Big Switch Room, the pot the you toss at the switch also contains a bomb that you will likely collect naturally. | ||
== Boss == | == Boss == | ||
| − | + | {{Main|Trinexx}} | |
| − | |||
= 100% NMG = | = 100% NMG = | ||
Latest revision as of 18:57, 9 August 2019
 | |
| Boss | Trinexx |
|---|---|
| Dungeon item | Mirror Shield |
| Previous dungeon | Misery Mire |
| Next dungeon | Ganon's Tower |
Contents
Any% NMG
Death Mountain
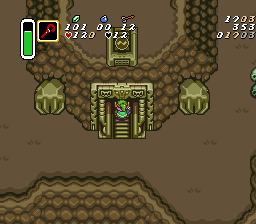
Placeholder text ..
Key Pokey 1
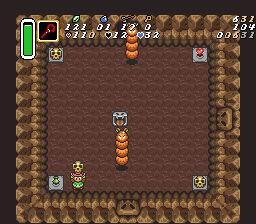
To kill a Pokey in one spin you have to let it jump into your spin attack. Position yourself in the Pokey's path in front of it and make sure not to poke it with your sword. In this room it is a good idea to slash either left or right (whichever is the opposite of the direction the Pokey is going in) to avoid hitting any of the enemies with sword beams, in case you have them. Remember that sometimes Pokey-body parts will fly around the room and you basically aim their trajectory when you kill the poor thing, so try to consider it when picking a position.
Look at the Pokey while you enter the room: If it's going up, you can walk a few steps into the room before you charge your sword. If it's going down, you need to slash immediately.
Anticipate where possible items will drop (key/fairy!) and get used to the time it takes Link to actually pick them up. If you time it really well, you can sometimes even save some frames by charging a dash while waiting, but picking up the fairy is probably more important.
It's hard to actually save time with a dash in here. File
If you're in a situation where you don't care about the drops, setting up a keydash is easy for the upper patterns: just hug the top wall. File
Chomps
There are many strats for this room, that all have their uses depending on RNG/resources. When you enter the room, walk straight forward for a few steps and take that time to look at the chomps' movement, gauge which way will least likely be blocked and pick a direction to go in: left, right or center. Success is never guaranteed - these guys can and will block your shots at the last possible moment or hit you in some undodgable fashion, if they want to. The most important thing on this screen is probably to know how to react when things go wrong!
2x Cane
This strat arguably provides the best compromise between speed and safety, because you get invincibility from the pegs all the way up to the chest. It works the same way no matter if you are on the left or right side of the room. File
The longer you spend in this room, the more chances you give the chomps to get in your way. Going as fast as possible is the best safety! Some things to be aware of when trying to optimize this strat:
- Place the first cane block as early as possible
- Don't push the cane block
- Detonate the second cane block as soon as possible AFTER the pegs switch
- Keep moving while the cane projectiles are traveling towards the switch
- Push the upper half of the switch block
- Hold diagonal towards the chest as soon as the switch block starts moving
Backup
When you suspect your path and/or line of fire will be blocked on both the left and right side, this is a useful backup. Place the block closer to one switch than the other, dodge the first lunge attack and detonate only when you are right in front of the pegs. File
The first lunge attack can happen anywhere between 3-4 seconds after entering the room and the delay between the two chomps' attacks can be anywhere between 0-64 frames. Anything after the first attack is hard to test, because the randomness spirals out of control the longer you spend in the room.
Key Pokey 2
When you're approaching this room, think about whether you need to hit the switch and whether you need/want to pick up the (other) drops from the Pokey.
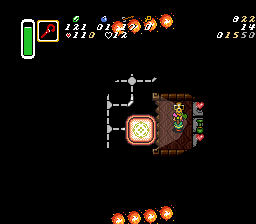
The easy way to do this room is to pull out the Fire Rod and blast the Pokey (caution: flying body parts may still appear), then take the hit from the Rabbit Beam intentionally. This also allows you to use fire in the upcoming double Pokey room. Costs about 4-5 seconds in total, since you use some extra menus and need more magic.
The laser eye only starts shooting when Link faces it. If you're approaching the door from below, walk all the way to the wall before you move up in front of the eye. For some reason it is much more lenient when approaching from above.
Close to optimal strats for all four patterns, hitting the switch:
Bottom Left
Keydash setup by touching the left wall, turning at the right moment while charging the dash to manipulate the laser eye. There are safer variations of this strat. For example: Wait for the Pokey to rebound off the wall and spin him closer to the center of the room, then eat the Rabbit Beam. File
Double Pokeys
![]() BluntBunny made a video showing strats for all patterns!
BluntBunny made a video showing strats for all patterns!
Laser Skip
Fast Laser Skip
Pressing v+A on the same frame when initiating the dash will give you a 2-frame window to get Fast Laser Skip. File
Note that if the Beetle rushes straight at you you might not have enough time to do Fast Laser Skip. In this situation (or if you're not comfortable doing Fast Laser Skip), you can use a Somaria Block to get the beetle to bounce into the pit, giving you plenty of time to setup the dash.
Cane Laser Skip
Place the Somaria Block so that the bettle bounces diagonally off of it and into the pit. File
Position yourself and dash inmediately.
Big Switch Puzzle
Safe8'23
Safe and easy strat with no moving parts. Make sure not to push the cane block by accident. File
Orange Canedash7'38
Safe for every enemy pattern, as long as you hit the orange pegs to gain invulnerability. File
Blue Canedash7'27
Fastest strat when the Pokey is not in the way. Place the cane block as high as possible. Often needs a little bit of extra movement to dodge the Pokey, since all positioning required is very precise. File
Collected Items
Arrows
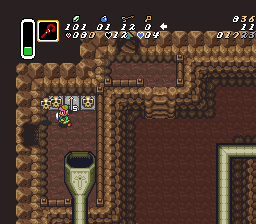
Five relatively quick to get arrows under this pot. While you're in the pipe approaching is a good time to think about whether you need these to get the required 18 at Ice Armos.
Magic
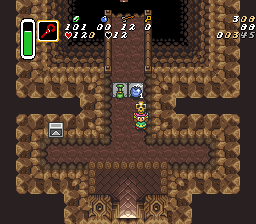
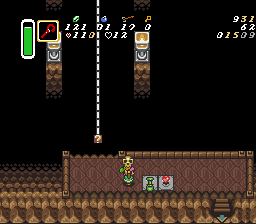
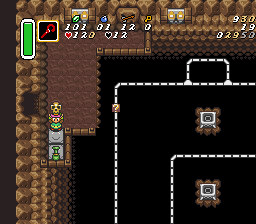
With standard strats you have just enough magic for the entire dungeon. Sword-beam strats at Chomps or the Crystalroller key chest can even give some leeway. The full magic refills right at the beginning and end are the only ones necessary to pick up. If one of the Pokeys drops a refill right in your path you can save frames by getting that one instead of the last pot, but you'll have two less rod shots for the Trinexx fight.
If you use the Fire Rod against Pokeys (or wasted some magic), you'll have to pick up one more refill.
In case of emergency:
Bombs
You'll need one bomb in Ganon's Tower, so grab the quick one next to the full magic refill in the Turtle Rock entrance room if you're empty. If you do the safe strategy for Big Switch Room, the pot the you toss at the switch also contains a bomb that you will likely collect naturally.
Boss
- Main article: Trinexx
100% NMG
Placeholder text ..
