Difference between revisions of "Desert Palace"
| Line 12: | Line 12: | ||
= Any% NMG = | = Any% NMG = | ||
| − | + | === Theory-TAS === | |
| − | |||
| − | == Theory-TAS == | ||
{{#ev:twitchvod|v44070881|600|inline|||t=11m58s&autoplay=false&muted=true}} | {{#ev:twitchvod|v44070881|600|inline|||t=11m58s&autoplay=false&muted=true}} | ||
| − | == Strats == | + | === Strats === |
| − | === Bridge Guard === | + | ==== Bridge Guard ==== |
[[File:makesure.png]] | [[File:makesure.png]] | ||
| Line 28: | Line 26: | ||
If you do clink on the green guard, let your dash take you just past the edge of the far pillar on the bridge, and nudge the bridge on your dash down. You should still clear all the guards. | If you do clink on the green guard, let your dash take you just past the edge of the far pillar on the bridge, and nudge the bridge on your dash down. You should still clear all the guards. | ||
| − | |||
| − | + | ==== Library ==== | |
| + | |||
| + | {| | ||
| + | |<html5media width="384" loop muted>File:Nmg-desert-libraryin-ss.mp4</html5media> | ||
| + | |<html5media width="384" loop muted>File:Nmg-desert-libraryin-dash.mp4</html5media> | ||
| + | |} | ||
| + | |||
| + | 9'41 vs 10'16 | ||
| − | |||
{| | {| | ||
| − | |<html5media width=" | + | |<html5media width="384" loop muted>File:Nmg-desert-libraryout-ss.mp4</html5media> |
| − | |<html5media width=" | + | |<html5media width="384" loop muted>File:Nmg-desert-libraryout-dash.mp4</html5media> |
| − | |||
| − | |||
| − | |||
| − | |||
| − | |||
| − | |||
| − | |||
|} | |} | ||
| − | + | 7'08 vs 7'37 | |
| + | |||
| + | |||
| + | ==== Bonk key ==== | ||
| + | |||
| + | '''Optimal (6'09)''' | ||
| + | |||
| + | <html5media width="384" loop muted>File:Nmg-desert-bonkkey-optimal.mp4</html5media> | ||
| + | |||
| + | Moving this way allows to squeeze in some extra pumps. As long as you are holding diagonal when the Beamos shoots at you, you won't get hit. | ||
| + | |||
| + | |||
| + | '''Modern (6'12)''' | ||
| + | |||
| + | <html5media width="384" loop muted>File:Nmg-desert-bonkkey-modern.mp4</html5media> | ||
| + | |||
| + | This skips the problem of getting hit by the laser completely. | ||
| + | |||
| + | |||
| + | '''Easy (6'25)''' | ||
| + | |||
| + | <html5media width="384" loop muted>File:Nmg-desert-bonkkey-easy.mp4</html5media> | ||
| + | |||
| + | Just hold diagonal while you enter the room and the laser will never hit you. | ||
| + | |||
| + | |||
| + | '''Classic (6'13)''' | ||
| + | |||
| + | <html5media width="384" loop muted>File:Nmg-desert-bonkkey-classic.mp4</html5media> | ||
| + | |||
| + | This is what ChristosOwen does :^) | ||
| + | |||
| + | |||
| + | ==== Big Key cannon hallway ==== | ||
| + | |||
| + | The timing with which the wall-cannons in this room shoot is determined by a frame rule (''Details''). That means it is entirely random and you have to react to what you get. When you enter the room (and have stereo sound available) you can listen to the cannon shots to sometimes get a clue for which pattern to expect. The rare 1-2-1 pattern is especially easy to identify, since you will hear the first shot only on the left channel. Here are three examples of how to deal with different patterns with the help of a pause buffer. | ||
| + | |||
| + | '''Bad 2-2 pattern (9'48)''' | ||
| + | |||
| + | <html5media width="384" loop muted>File:Nmg-desert-cannons-2-2bad.mp4</html5media> | ||
| + | |||
| + | A pause is used right after passing the half-columns to easily identify the cannonball pattern. In this case the pause is especially helpful, because it manipulates the pattern on the way back to not block the dash. | ||
| + | |||
| + | |||
| + | '''Good 2-2 pattern (9'13)''' | ||
| + | |||
| + | <html5media width="384" loop muted>File:Nmg-desert-cannons-2-2good.mp4</html5media> | ||
| + | |||
| + | With good luck no adjustment at all is necessary. | ||
| + | |||
| + | |||
| + | '''The rare 1-2-1 pattern (9'53)''' | ||
| + | |||
| + | <html5media width="384" loop muted>File:nmg-desert-cannons-1-2-1.mp4</html5media> | ||
| + | |||
| + | This pattern is very rare, because it only appears when the room is entered in the 5-frame-window after the right cannon shot. It also requires a very late dash-cancel and a few extra steps to avoid all cannonballs. Be prepared! | ||
| + | |||
| + | |||
| + | ==== Torches ==== | ||
| + | |||
| + | '''Fastest (15'35)''' | ||
| + | |||
| + | <html5media width="384" loop muted>File:Nmg-desert-torches-noarrowsfast.mp4</html5media> | ||
| + | |||
| + | Requires rapid lighting of the first two torches to make it past the Eyegore. | ||
| + | |||
| + | |||
| + | '''Safer (15'51)''' | ||
| + | |||
| + | <html5media width="384" loop muted>File:Nmg-desert-torches-noarrowsslow.mp4</html5media> | ||
| + | |||
| + | Cancelling the dash earlier and moving north first after lighting the bottom torches manipulates the Eyegore into walking down. | ||
| + | |||
| − | + | '''Extra arrows (16'36)''' | |
| − | + | <html5media width="384" loop muted>File:Nmg-desert-torches-arrows.mp4</html5media> | |
| − | + | These arrows take about a second to pick up and are a safe choice at under 25 arrows. | |
| − | |||
| − | == Collected Items == | + | === Collected Items === |
| − | You pick up [[ Pegasus | + | You pick up [[ Pegasus Boots ]], [[ Book of Mudora ]] and [[ Power Glove ]] in this segment. |
| − | == Boss == | + | === Boss === |
[[ Lanmolas | See Lanmolas ]] | [[ Lanmolas | See Lanmolas ]] | ||
Revision as of 17:20, 6 January 2017
 | |
| Boss | Lanmolas |
|---|---|
| Dungeon item | Power Glove |
| Previous dungeon | Eastern Palace |
| Next dungeon | Tower of Hera |
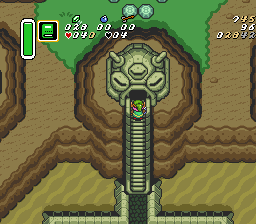
The third dungeon of the game. You're supposed to get the Pegasus Boots before entering the palace, and so a lot of time is usually spent dashing around in this segment.
Contents
Any% NMG
Theory-TAS
Strats
Bridge Guard
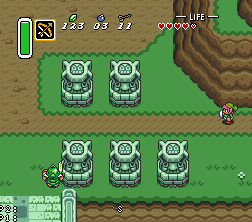
To avoid getting hit by the guards in this screen, hold <^ when entering the screen, and start dashing as soon as possible. Remember to stop holding ^ before the dash starts. You will know you have it right if you don't clink on the green guard.
If you do clink on the green guard, let your dash take you just past the edge of the far pillar on the bridge, and nudge the bridge on your dash down. You should still clear all the guards.
Library
9'41 vs 10'16
7'08 vs 7'37
Bonk key
Optimal (6'09)
Moving this way allows to squeeze in some extra pumps. As long as you are holding diagonal when the Beamos shoots at you, you won't get hit.
Modern (6'12)
This skips the problem of getting hit by the laser completely.
Easy (6'25)
Just hold diagonal while you enter the room and the laser will never hit you.
Classic (6'13)
This is what ChristosOwen does :^)
Big Key cannon hallway
The timing with which the wall-cannons in this room shoot is determined by a frame rule (Details). That means it is entirely random and you have to react to what you get. When you enter the room (and have stereo sound available) you can listen to the cannon shots to sometimes get a clue for which pattern to expect. The rare 1-2-1 pattern is especially easy to identify, since you will hear the first shot only on the left channel. Here are three examples of how to deal with different patterns with the help of a pause buffer.
Bad 2-2 pattern (9'48)
A pause is used right after passing the half-columns to easily identify the cannonball pattern. In this case the pause is especially helpful, because it manipulates the pattern on the way back to not block the dash.
Good 2-2 pattern (9'13)
With good luck no adjustment at all is necessary.
The rare 1-2-1 pattern (9'53)
This pattern is very rare, because it only appears when the room is entered in the 5-frame-window after the right cannon shot. It also requires a very late dash-cancel and a few extra steps to avoid all cannonballs. Be prepared!
Torches
Fastest (15'35)
Requires rapid lighting of the first two torches to make it past the Eyegore.
Safer (15'51)
Cancelling the dash earlier and moving north first after lighting the bottom torches manipulates the Eyegore into walking down.
Extra arrows (16'36)
These arrows take about a second to pick up and are a safe choice at under 25 arrows.
Collected Items
You pick up Pegasus Boots , Book of Mudora and Power Glove in this segment.
Boss
100% NMG
Placeholder text ..
