Difference between revisions of "Tower of Hera"
(→Flying tiles room) |
(→Moon Pearl bomb jump) |
||
| Line 90: | Line 90: | ||
| description = The fastest bomb jump strategy, but also the hardest. The bomb can be planted as Link clears the tile where the top pot was. This is very early and risky though, so you can opt to plant the bomb a little later for more time to position Link. The bomb must be thrown against the wall and then Link needs to be one 1 of the 2 closest pixels to the gap while the bomb explodes. A pause buffer to the Bow (which is the next item needed in the speedrun) can be used to make getting Link on the correct position easier. | | description = The fastest bomb jump strategy, but also the hardest. The bomb can be planted as Link clears the tile where the top pot was. This is very early and risky though, so you can opt to plant the bomb a little later for more time to position Link. The bomb must be thrown against the wall and then Link needs to be one 1 of the 2 closest pixels to the gap while the bomb explodes. A pause buffer to the Bow (which is the next item needed in the speedrun) can be used to make getting Link on the correct position easier. | ||
}} | }} | ||
| + | |||
| + | ''' Visual Cues ''' | ||
| + | |||
| + | For not dashing you must be within 2 pixels of the pit for the explosion to push Link across. | ||
| + | |||
| + | {|style="margin: 0 none;" | ||
| + | | [[File:BJ_1px.png|thumb|250px|none|1px away from pit]] | ||
| + | | [[File:BJ_2px.png|thumb|250px|center|2px away from pit]] | ||
| + | |} | ||
=== Bumper Room === | === Bumper Room === | ||
Revision as of 23:09, 7 March 2017
 | |
| Boss | Moldorm |
|---|---|
| Dungeon item | Moon Pearl |
| Previous dungeon | Desert Palace |
| Next dungeon | Agahnim's Tower |
Contents
Any% NMG
Desert Escape
Safe11'06
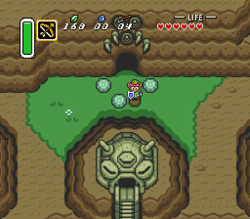
Safest strategy on this screen. Be sure to align with the right wall after hopping down to avoid any cacti. Dash to the right when you get to the top of the mouth of the octorok pattern in the ground of the desert area. File
Sandman Dash10'53
Slightly faster strategy than the safe one. Be sure to lift the rock and ledgehop in the correct way (see below). At the Sandman, slash and hold sword to the right and dash. File
Cactus Dash10'43
Again just a slightly faster strategy than the one before. Do the same rock lift and ledgehop as the Sandman strat and be sure not to move down any before starting to dash. This will make sure that you're on a good grid for hitting a 2 pixel window between the two cacti. This will require a frame perfect dash cancel and risks taking damage from the cacti if you miss, so this strat is not recommended for newer players. File
Short Ledgehop
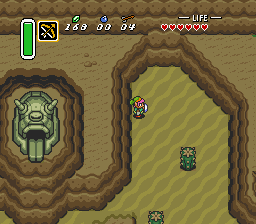
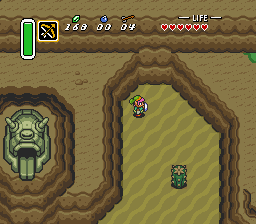
To land flush with the left wall after ledgehopping, there is a small trick. First lift the rock as you can see on the picture below and get in a position so that Link will be aligned with the top right rock on his dash. This means either being on the exact coordinate as the bottom of the rock or nudging it slightly on your dash.
If you did everything correctly, you should get a short hop and land like so:
If not done correctly:
Fake Flippers
Tile Room
There are a few options for this room.
The easiest thing to do is just hit the switch and survive the tiles. In the following room, you will lose just a bit of time hitting the switch to proceed.
A slightly better strategy (that saves around 20 frames) uses a boomerang dash to have the orange pegs already down in the following room. The two ways of doing this are shown here:
Down Throw
Stand around the spot shown in the video, face right, and press v+Y+A all on the same frame. Release v before Link starts dashing. This is easier to execute than the diagonal throw because it uses one less input. However, if you mistime it, you can hit the switch without being able to dash onto the pegs, and every time you hit the switch, the game is paused for 20 frames while the pegs are flipped. File
Diagonal Throw
Stand around the spot shown in the video, face right, and press <+v+Y+A all on the same frame. Release v and < before Link starts dashing. This adds another dpad input compared to the down throw, making it harder to execute. But if you stand in the spot shown in the video, the boomerang will miss the switch unless Link successfully dashes across the room. This removes the risk of losing time due to accidental switch hits. Additionally, from the position you land on the pegs, you can press v to snap Link up to the exact coordinate of the door, automatically removing any nudges when you go to leave the room. File
Moon Pearl bomb jump
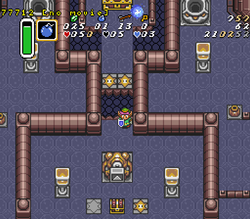
To get the Moon Pearl as early as possible we will use a bomb jump. The main strategies for this are shown below as well as pictures of the relevant visual cues. Usually, you'll need to be within 2 pixels of the pit for a bomb jump like this to work. However, since there's a nearby wall, we can bonk to expand that pixel window to 6, making the trick much easier.
Safe15'20
Easiest version of the bomb jump. Approach the pit and do a dash turn to face down without moving down. Link must be within 6 pixels of the gap (see visual cue below). Plant the bomb and then bonk the wall so that Link is in his bonk animation while the bomb is exploding. File
Dash Early Jump14'49
Slightly faster strategy than the safe one. Hold <^ against the top wall until more than half of Link is past the corner, then plant the bomb. Care must be taken to ensure that you move far enough away from the bomb to not pick it up when trying to dash. This also has a 6 pixel window due to bonking. File
Early Jump13'04
The fastest bomb jump strategy, but also the hardest. The bomb can be planted as Link clears the tile where the top pot was. This is very early and risky though, so you can opt to plant the bomb a little later for more time to position Link. The bomb must be thrown against the wall and then Link needs to be one 1 of the 2 closest pixels to the gap while the bomb explodes. A pause buffer to the Bow (which is the next item needed in the speedrun) can be used to make getting Link on the correct position easier. File
Visual Cues
For not dashing you must be within 2 pixels of the pit for the explosion to push Link across.
Bumper Room
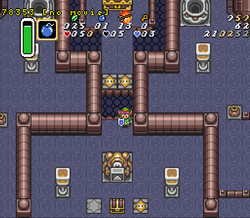
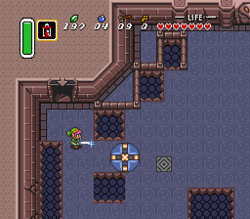
Enter the room, move down and get yourself in a position to dash through above the blue bumper. You have a 4 pixel window (Y-axis, X-axis doesn't matter) to work with to get the dash successfully. To align yourself easier you can hold your sword out like in the picture below.
Collected Items
You pick up Magic Mirror and Moon Pearl in this dungeon.
Boss
See: Moldorm
100% NMG
Placeholder text ..
